How to: Set up Proxmox
A beginner-friendly guide to installing Proxmox VE 8.2 on your homelab using a USB installer.
Proxmox is a lightweight and easy to set up Hypervisor platform. Within minutes, you can have virtual machines to perform whichever task you choose next. From running Home Assistant, to more complex software stacks, Proxmox is a lifesaver when it comes to keeping your stack organized.
Proxmox can be installed on just about any x86 or x64 computer or server. You don't need beefy server equipment for this! Quick disclaimer: Installing any operating system will generally destroy all data on the drive you're installing it on unless you plan to do a dual-boot setup which isn't ideal for Proxmox, So make sure your drive has no important data before installing.
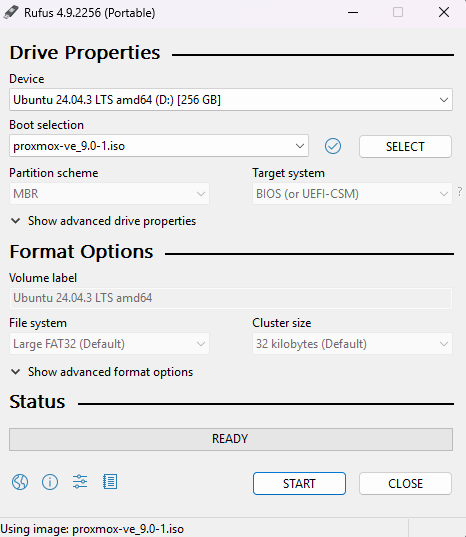
To get started, you'll need a few things. First off, is a flash drive. This is what you'll use to install Proxmox on your target machine. Second, is Rufus. https://rufus.ie/en/ This tool allows you to flash your Proxmox ISO image to the flash drive. Third, is the Proxmox ISO which can be downloaded from: https://www.proxmox.com/en/downloads, select Proxmox VE ISO Installer.
If you haven't already installed Rufus, be sure to do so now if you aren't using the portable version. Next, run Rufus, and select the drive you are flashing to. This will also erase all contents on the flash drive, so back it up if its important or use a different drive. Next, you will want to hit the Select button, and chose the Proxmox ISO you just downloaded.
Now, Rufus should look like this:
At this point, you can press start. Rufus will start flashing the Proxmox installer to the drive you've selected. Go ahead and press OK when the message about erasing the disk pops up provided you are okay with that. Once this process finishes, go ahead and take the drive out of your Windows machine, and plug it into the machine you are installing Proxmox to. You may need to look up how to enter your machines boot menu on startup, as it varies between different manufacturers. Once that is figured out, boot to the drive you have just created.
After booting to your newly flashed drive, you will be met with this menu:

Click on the first option (Install Proxmox VE (Graphical))
Next, you will be met with the Terms of Service. Once accepted, you will be brought to this menu:

Under "Target Harddisk" select which drive you want to install your OS to. If you only have one drive in your system, this will be the only drive available to install to. Press Next. Then, fill out your timezone information and hit next again.
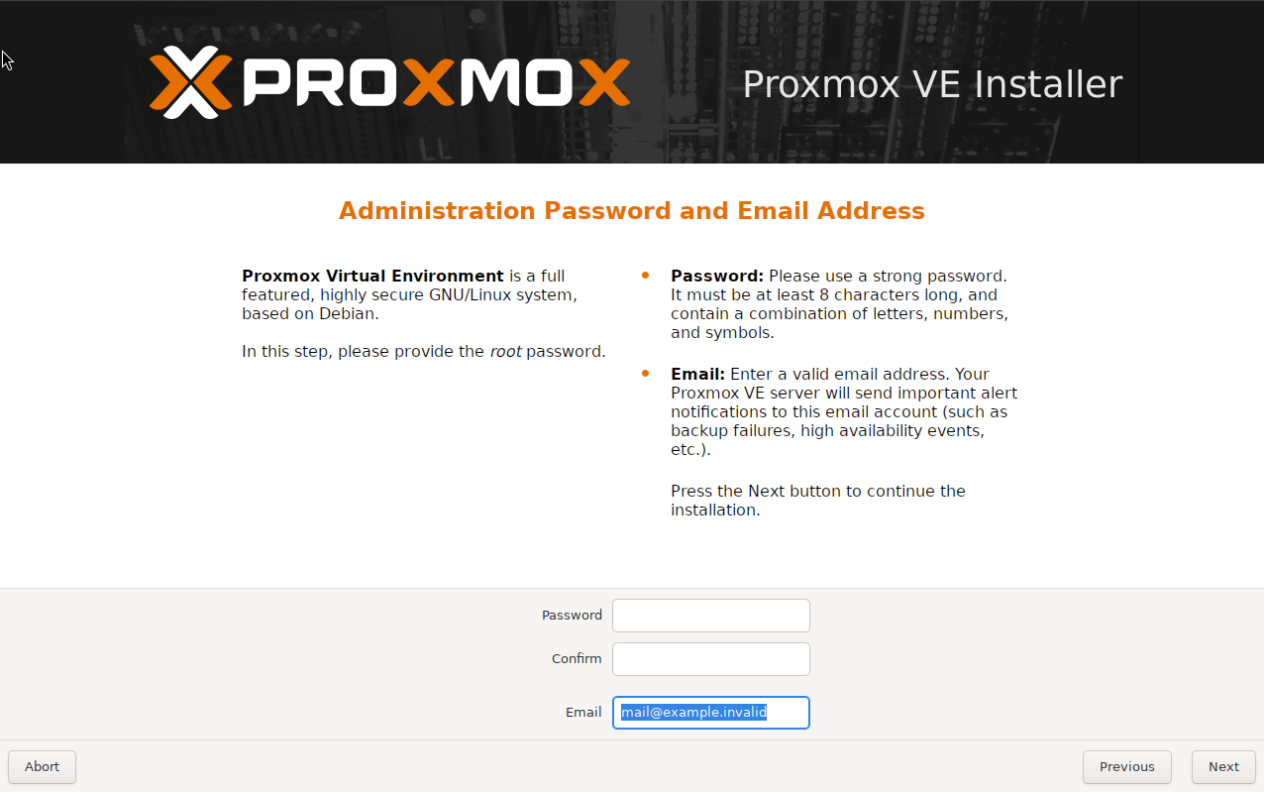
Here, enter the password you want for your system and a valid email address. Click next.
Up next, is the network configuration page. If you only have one network device, this will be simple as it will only see the one device during setup.
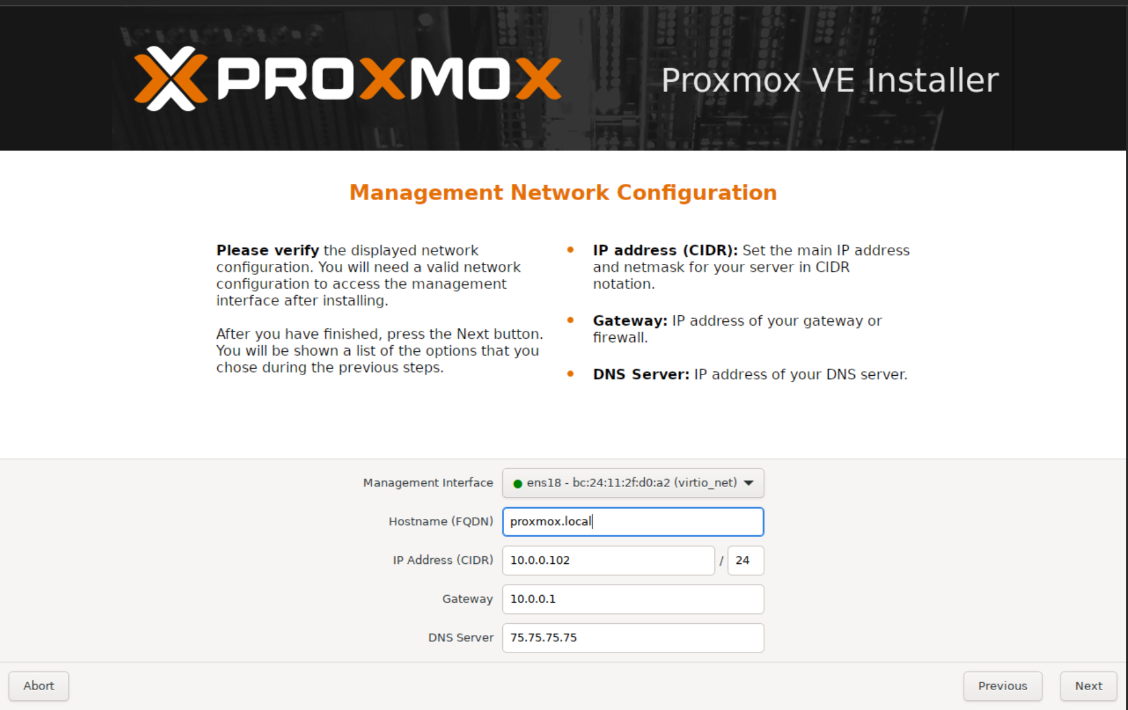
Under hostname, you will need to change the default value as it is invalid, I would recommend changing this to proxmox.local and every other populated field will be good as is, unless you want to change the address assigned to your machine, In this menu, take note of your IP address, this will be important later.
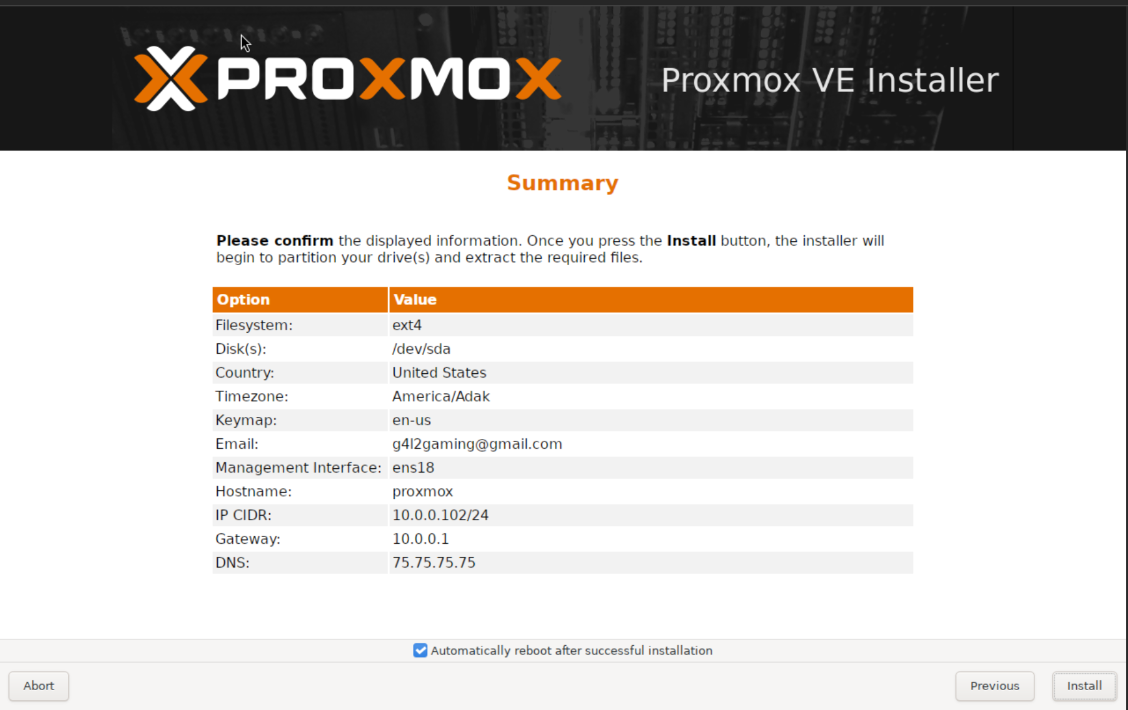
After all of that, you're just about done! look over the summary to make sure everything looks correct, then press install. Then, the process will start! After the install is complete, your system will reboot into the OS, and that's it! You can connect to the Proxmox web UI by using the following as a link: http://YourIPHere:8006 or use the hostname you set. Your username for the web UI will be root, and the password is the one you set up during the install.
By following this guide, you will have created your very own hypervisor system running on your network. Up next, we will cover how to set up a VM, and the different configuration options there are.